installation
nvidia driver
This method is preferred because files are registered within the package manage system.
- go to the cuda website
- choose your OS:
- do not run the command which installs cuda
- use the network install method
- after running the commands, a package called
nvidia-driver-***will be available through the package manage system.- Install the version that you prefered.
uninstall
For ubuntu run the following command:
# notice that nvidia-docker might also be matched
sudo apt purge nvidia-*
sudo apt purge libnvidia-*
sudo apt autoremove
multiple cuda version
By default, cuda will be installed in /usr/local
# install cuda only, do not override driver that we installed
sudo sh <run_file> --silent --toolkit
# rm the symbolic link so that multiple version can co-exist
sudo rm -rf /usr/local/cuda
Append to PATH for your specific CUDA version:
This path will change based on cuda version.
So follow the document in cuda install guide > post-install actions > environment setup.
Choose the correct document in the top right corner of the webpage.
For 10.0, you can use the following lines. But notice that the command changes for all cuda versions.
# do not copy
CUDA_PATH=/usr/local/cuda-10.0
export PATH=$CUDA_PATH/bin:$CUDA_PATH/NsightCompute-1.0${PATH:+:${PATH}}
export LD_LIBRARY_PATH=$CUDA_PATH/lib64${LD_LIBRARY_PATH:+:${LD_LIBRARY_PATH}}
cudnn
# copy file into place as shown in guide
https://docs.nvidia.com/deeplearning/cudnn/install-guide/index.html

# make sure it is registered in path
sudo ldconfig
tensorrt
GPUDirect
GPU direct is a technology to help data transmission on gpu. Its official website is here
availbility depends on PCIe topology
GPU direct requires disable ACS and IOMMU
https://docs.nvidia.com/gpudirect-storage/configuration-guide/index.html
P2P - GPU to GPU
Exchange data between GPUs directly without CPU intervention.
Should be supported by the CUDA driver
P2P can also operate over Nvlink
https://github.com/NVIDIA/nvbandwidth
rdma - GPU to NIC
GPU register itself into OFED via PeerDirect client
https://enterprise-support.nvidia.com/s/article/howto-implement-peerdirect-client-using-mlnx-ofed
Driver support nvidia-peermem will register GPU into OFED when loaded
https://download.nvidia.com/XFree86/Linux-x86_64/470.141.03/README/nvidia-peermem.html
historically, supported by nv_peer_mem
storage
Exchange data between GPU and disk. Basically, let GPU understand certain file system.
https://developer.nvidia.com/blog/gpudirect-storage/
https://docs.nvidia.com/gpudirect-storage/api-reference-guide/index.html
NvLink
Run test with the following steps:
- tensorflow image:
nvcr.io/nvidia/tensorflow:19.08-py3 - basic test:
python resnet.py --layers 50 -b 64 --precision fp16 [--use_xla] - test with mpi:
mpiexec --allow-run-as-root -np 2 python resnet.py --layers=50 -b 64 --precision=fp16- batch size is set to 64 due to memory size
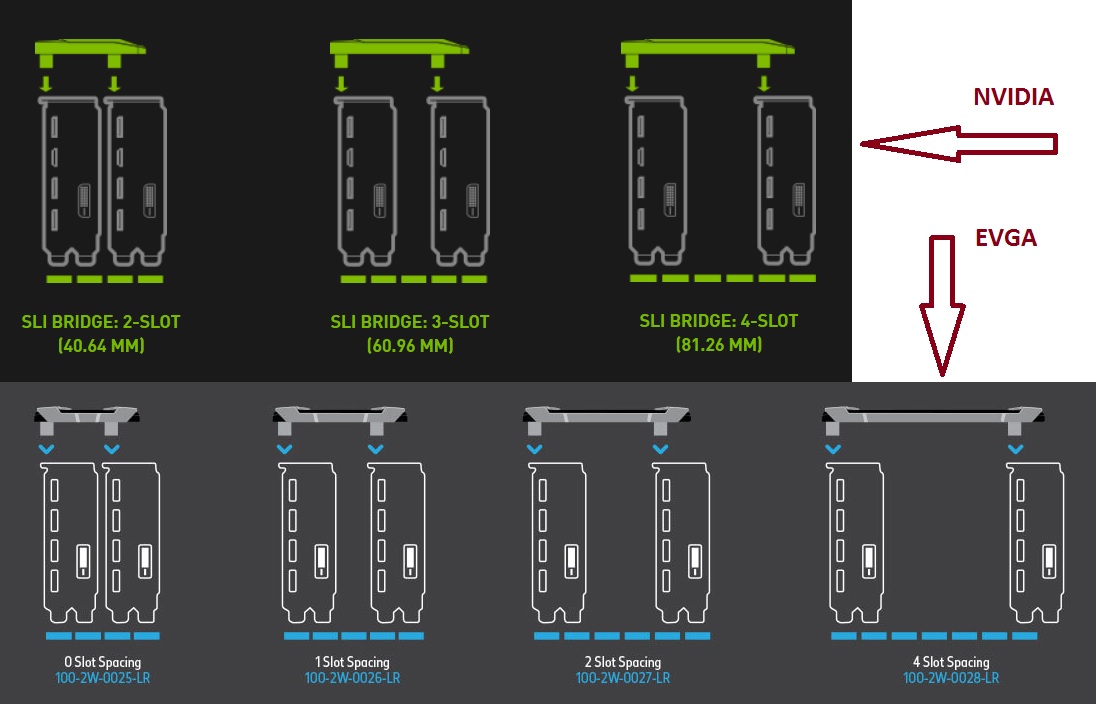
Nvlink slot
GPU test
We could use NVVS (Nvidia Validation Suite) to view various information.
It is available in the DCGM (NVIDIA Data Center GPU Manager)
We should use DCGM directly to view various informaiton.
sudo nv-hostengine # start dcgmi server
dcgmi topo --gpuid 0
dcgmi nvlink --link-status
there seems to be a internal memory test for nvidia card
MOdular Diagnostic Suite (MODS) NVIDIA Field Diagnostic
MATS?
there is a reviewer toolkit
Latency & Display Analysis Tool (LDAT)
Power Capture Analysis Tool (PCAT)
FrameView
misc
Enable persistence mode on startup
nvidia-persistent hold device state to avoid multiple initialization, which might cause false reading on nvidia-smi
Persistence mode should work with normal installation. Here are some old issues that prevent it.
- libnvidia-cfg is not installed automatically. Such problem can be revealed by
sudo less /var/log/syslog - The
nvidia-persistenced.servicedefaults to not enable persistent mode.- edit the file or do it like the following service file.
- credit
The power limit can be found at overclock.net Or techpowerup.com
[Unit]
Description=Set persistence mode and power limit of GPU
Wants=syslog.target
After=nvidia-persistenced.service

[Service]
Type=oneshot
RemainAfterExit=true
ExecStart=/bin/sh -c "nvidia-smi -pm 1 && nvidia-smi -pl <PL>"

[Install]
WantedBy=multi-user.target
-> gdrdrv service is keeping the nvidia-persistenced process runing
overclock
sudo nvidia-smi --auto-boost-default=0
sudo nvidia-smi -ac 2505,875 # for P2
sudo nvidia-smi -ac 877,1530 # for P3
sudo nvidia-smi -ac 2505,1177 # for G3